RV Kitchen Decor Ideas That Survive the Road
Our camper kitchen used to look like a beige dentist waiting room. Tan cabinets. Tan walls. A faux-granite countertop sticker thing that was already lifting at one corner when we bought it.
I didn’t want to gut it. We did that fight already, two summers back, and I am not sanding cabinets again. What I wanted was the soft stuff. A sign over the stove. A towel that isn’t sad. A little wind spinner outside the window so when I’m doing dishes at the sink I have something to look at besides the neighbor’s generator. Styling, not renovating. Cheaper too.
Most of what I’m about to show you started as a file from an indie design shop, printed at home or cut on a borrowed Cricut on my sister’s kitchen table while she made fun of me. Some of these have an affiliate link, so if you grab one I get a tiny cut and you get my mistakes for free.
The mandala motorhome that finally filled the empty cabinet door

There’s a cabinet door right next to our two-burner stove that just sat there. Blank. Begging for something. This little mandala-style motorhome design is what I put on it, cut in matte black vinyl on the Cricut.
I weeded it badly the first try. The thin lines inside the wheels lifted and I peeled half of it off without noticing until it was already on the door, crooked, missing a chunk. Second sheet went better. Slow weeding, transfer tape, the whole boring ritual.
It reads clean from across the camper, which is the test for me. Up close you can see I’m not a vinyl pro. The detail in it is fine but it is fiddly, so if you’re new to cutting these, size it a little bigger than feels right. The tiny bits at small scale will fight you.
A layered cutout for the dead space above the dinette
I do not own a laser. I keep saying I’ll buy one and then I buy more coffee instead. So I sent this one to a maker friend in Bend who runs a little Glowforge out of his garage, and he cut it from 3mm birch ply for the cost of a six pack.
It’s a layered scene, the kind that stacks up so it has actual depth instead of being flat. I stained it walnut and screwed it to the wall above the dinette where there used to be nothing. It catches the morning light and throws a tiny shadow.
One nitpick. The fit between layers was tight, almost too tight, and I had to sand a couple tabs to get them seated. If you cut it yourself, test the kerf on a scrap first. My friend said the same thing, less politely.
The standing wood scene that lives by the coffee station
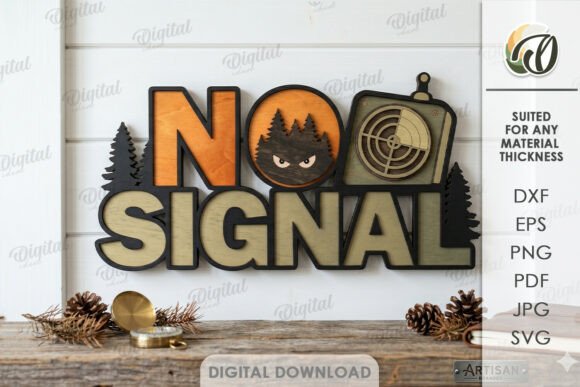
This is a different one in the same laser-cut family, and I liked it enough to do two. The first version of these I tried to cut on cardstock with a craft knife like a maniac. Do not. The depth needs real material.
He cut this one in ply again and I left it raw, no stain, just a coat of wipe-on poly. It stands on the counter next to the kettle. Free-standing, so when we hit a pothole on the way out of camp it tips over and I find it face-down in the sink. Worth it anyway.
The layers nest into each other and the small interior cuts are delicate. A piece of mine snapped while I was assembling it, the thinnest little branch. Glued it back, you can’t tell unless I point it out, which I just did.
Third in the set, the one I gave away and then remade
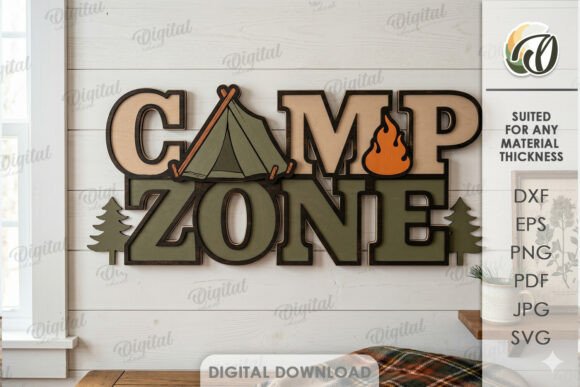
Confession. I cut this third laser scene as a gift for the camp mom two sites down from us at a lake near Truckee, because she’d been admiring the others through our window all week.
Then I got home and missed it. So I had it cut again for our own kitchen, this time in a darker ply. It sits on the shelf above the sink where it can’t fall, which I learned matters with these standing ones.
The assembly took me about twenty minutes with wood glue and a lot of squinting at the little numbered tabs. Sticky fingers, glue everywhere. My one gripe is the instructions are basically just the file, so you’re figuring out the stack order yourself. Lay all the layers out before you glue anything. I did not, the first time.
The little standing raccoon that guards the snack drawer

Okay this one is pure silliness and I love it. A raccoon, standing up, cut as a small free-standing decor piece. Given how many actual raccoons have raided our cooler over the years, it felt right to put one in charge of the snacks.
Got it cut from thin ply, painted the mask and the little hands by hand with craft paint at the picnic table. Took two coats. My kid did the eyes and they’re slightly cross-eyed, which makes it better.
It’s small, so it perches on the windowsill over the kitchenette. The base is narrow, so on travel days it goes in a drawer or it becomes a projectile. Cute, cheap, takes five minutes to make once it’s cut. The painting is where the time goes.
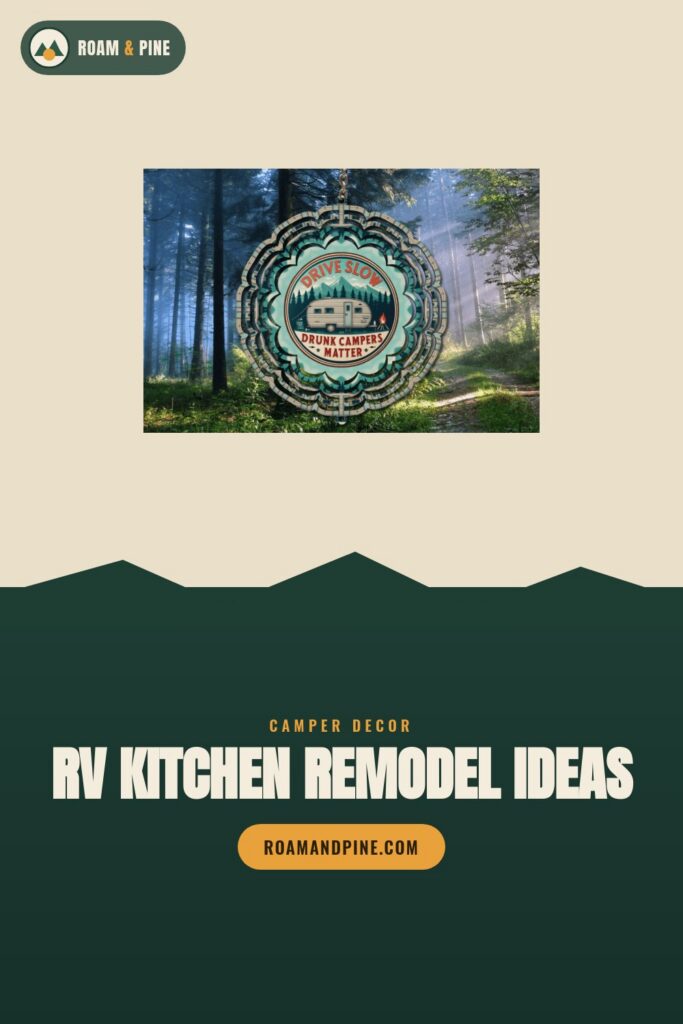
Drive slow spinner for the window I do dishes at

Technically this hangs outside, but it’s decor for the kitchen because it’s right outside the sink window and it’s the thing I stare at while scrubbing the bean pot.
It’s a wind spinner design, the kind that twists in layers when the breeze hits it. I had this printed onto a metal blank by a print shop in town rather than fighting it myself, because I’d already ruined one trying to cut acrylic at home. The “drive slow” text reads as a little wink to anyone walking past our site.
It spins like crazy in real wind and just sort of sulks in a light breeze. Hang it where it gets airflow. Ours kept tangling on the awning arm until I moved the hook out about a foot.
Coffee mug art that turned a $2 thrift frame into kitchen decor
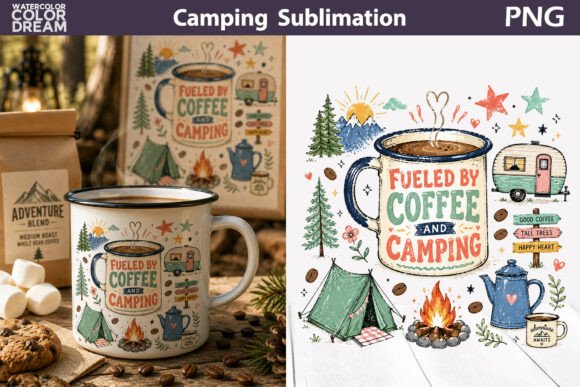
This started as a near-nothing project. Camping coffee mug clipart, a free afternoon, and a warped wood frame I grabbed for two bucks at the thrift store off the highway near Redding.
I printed it on regular matte cardstock at the library copier, trimmed it with the paper cutter there, and slid it into the frame. Propped it on the little ledge by the coffee maker. Done in fifteen minutes including the drive.
The art itself is crisp and the colors held up fine on the cheap printer. My only nitpick is I printed it once on glossy photo paper first and it looked plasticky in the camper light. Matte is the move in a small space. The glossy version is now a bookmark.
A garden flag I stuck in the planter box by the camper steps

Garden flags are not just for actual gardens, turns out. This camping lady design is now planted in the little herb box I keep on a stand right outside the kitchen window, between the basil and the very dead cilantro.
I didn’t sew it. I sent the file to one of those print-on-fabric services and they did a double-sided one for less than I expected. Slid it onto a cheap metal flag stand from the hardware store.
It fades a touch in full sun, which I expected. After a season it’s a little softer in color than day one. I bring it in when we’re parked for weeks. The fabric is light enough that on a still day it just hangs there limp, which is less charming, but on a breezy afternoon it earns its spot.
A camper quote print over the spice rack
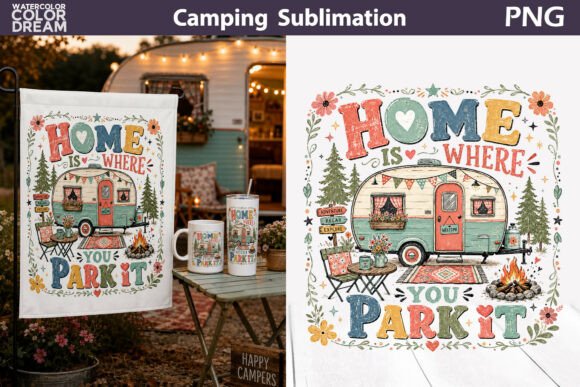
There was a sad empty rectangle of wall above my little magnetic spice rack and this quote print fixed it. It’s a typography design, just words, the kind of thing that sounds cheesy until it’s hanging in your own kitchen and you smile at it with your coffee.
Printed it at home on cream cardstock so it wouldn’t be stark white against the tan walls. Trimmed it, taped it up with washi at first to test the spot, then committed with proper mounting squares.
The file gave me a few sizes, which I appreciated, because the first print I did was way too big and looked like a motivational poster from a 1990s office. Smaller, off to one side, sitting near the spice jars. That worked. The big one is in the recycling.
The welcome flag that doubles as our find-the-site marker
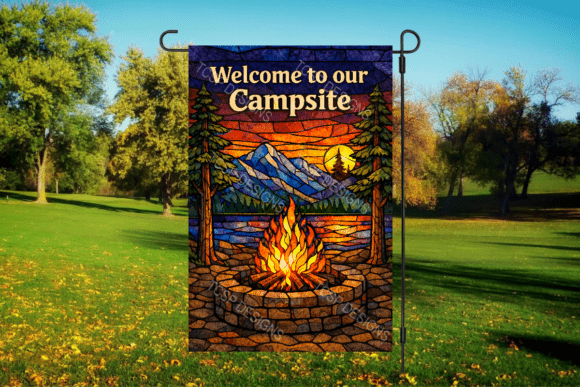
We got separated from our own campsite once, walking back in the dark from the bathhouse, and ended up trying to open a stranger’s door. Mortifying. So now we fly a “welcome to our campsite” flag by the steps and it does decor duty inside-out, brightening the view from the kitchen window too.
Same deal as the other flag, I had the design printed double-sided on fabric and clipped it to a stand. The lettering is bold enough to spot from down the loop, which is the actual point now.
It’s a touch bigger than the lady flag, so in strong wind it flaps loud against the camper at night. We take it down before bed. Minor, but I’d rather tell you than have you cursing it at 2am like I did.
Second spinner, hung where the first one couldn’t reach

Once I had one spinner going I wanted a second for the other corner of the awning, the side you see from the dinette window. This “camping life” design is the one I picked.
Got it made on a metal blank again at the same little shop, because I had learned my lesson about cutting these at home. It’s got that layered twist where the inner ring spins separately from the outer when the wind’s right.
The two spinners together look intentional now instead of like I bought one and gave up. My nitpick is the same as before, dead air kills it, so placement is everything. This one I hung from a shepherd’s hook stuck in the ground instead of the awning, and it spins way more freely out there.
Sunset lake scene that became a vinyl mural on the fridge
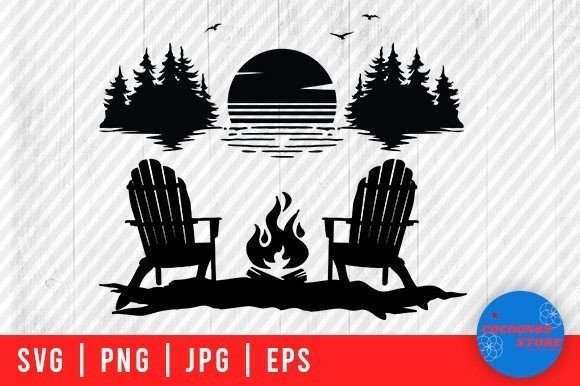
The camper fridge is small and white and boring and right in the middle of the kitchen, so it was the obvious blank canvas. This sunset lake scene with a little camper in it is what’s on it now.
I cut it as a multi-color vinyl decal, layering an orange sunset behind the trees and the camper, which sounds ambitious but is mostly just lining up registration marks and swearing a little. Cut it on the Cricut over two evenings.
The layering is where it gets tricky. I misaligned the sun the first time and it looked like the camper was on fire. Peeled it, redid it. Now it’s the first thing people notice when they step inside. The vinyl wipes clean, which matters on a fridge door that gets touched with greasy hands all day.
Frequently Asked Questions
What kind of paint do you use on rv walls?
I learned this the messy way. RV walls are usually a slick vinyl-coated panel, not drywall, so regular wall paint just peels and rubs off. What stuck for me was a good bonding primer first, then a satin or matte interior latex on top.
I did our kitchen wall in a soft sage and the primer is the whole game. Skip it and you’ll be repainting in a month, ask me how I know. Light scuff sand, primer, two thin coats. Thin, not one thick gloppy one.
Can you paint rv walls?
Yep, you can. People act like it’s forbidden but it’s just panels. The catch is the prep, because that shiny factory surface fights you if you don’t knock the gloss off and prime it.
We did ours over a long rainy weekend parked at a lake near Truckee. Tedious, not hard. The hardest part was taping around all the little trim strips and the window. Painting the actual flat wall took an hour.
Can you put wallpaper on rv walls?
Short answer, yes, and peel-and-stick is the friend here. I put a removable patterned paper behind our little spice shelf as a backsplash and it’s still up two seasons later.
Heads up though, those vinyl panels often have a faint texture, and peel-and-stick can show every bump or slowly let go at the seams over time. I ran a credit card hard along every edge and it mostly behaved. Corners are where it tries to escape.
Can you paint over rv walls?
You can paint right over the existing wall color, you just can’t skip the prep or it won’t hold. Same answer as painting them fresh, honestly. Clean it, scuff the gloss, prime, then your color.
I painted over the original beige in our kitchen without removing a single panel. Just covered it. The only spot that gave me trouble was near the stove where there was old grease film I hadn’t cleaned well enough, and the paint beaded up there until I went back with degreaser.
Before You Pack Up
None of this was a renovation. No saws, no torn-out cabinets, no second winter of regret. A few cut files, a borrowed Cricut, a maker friend with a laser, two trips to the library copier and one to the thrift store off the highway.
The camper kitchen feels like ours now. There’s a raccoon guarding the snacks and a fridge that looks like a sunset and a flag outside so we stop trying to walk into other people’s campers in the dark. Start with one thing. The wall over the stove is a good first victim.
More Camping Ideas We Love
Heads up: some links in this post are affiliate links. If you grab a file we love, we may earn a small commission at no extra cost to you. We only feature designs we would happily pack on our own trip.